반응형
Github의 Actions에 Aws S3연동 Vue프로젝트 배포관련 설정을 합니다.
작업순서는 다음과 같습니다.
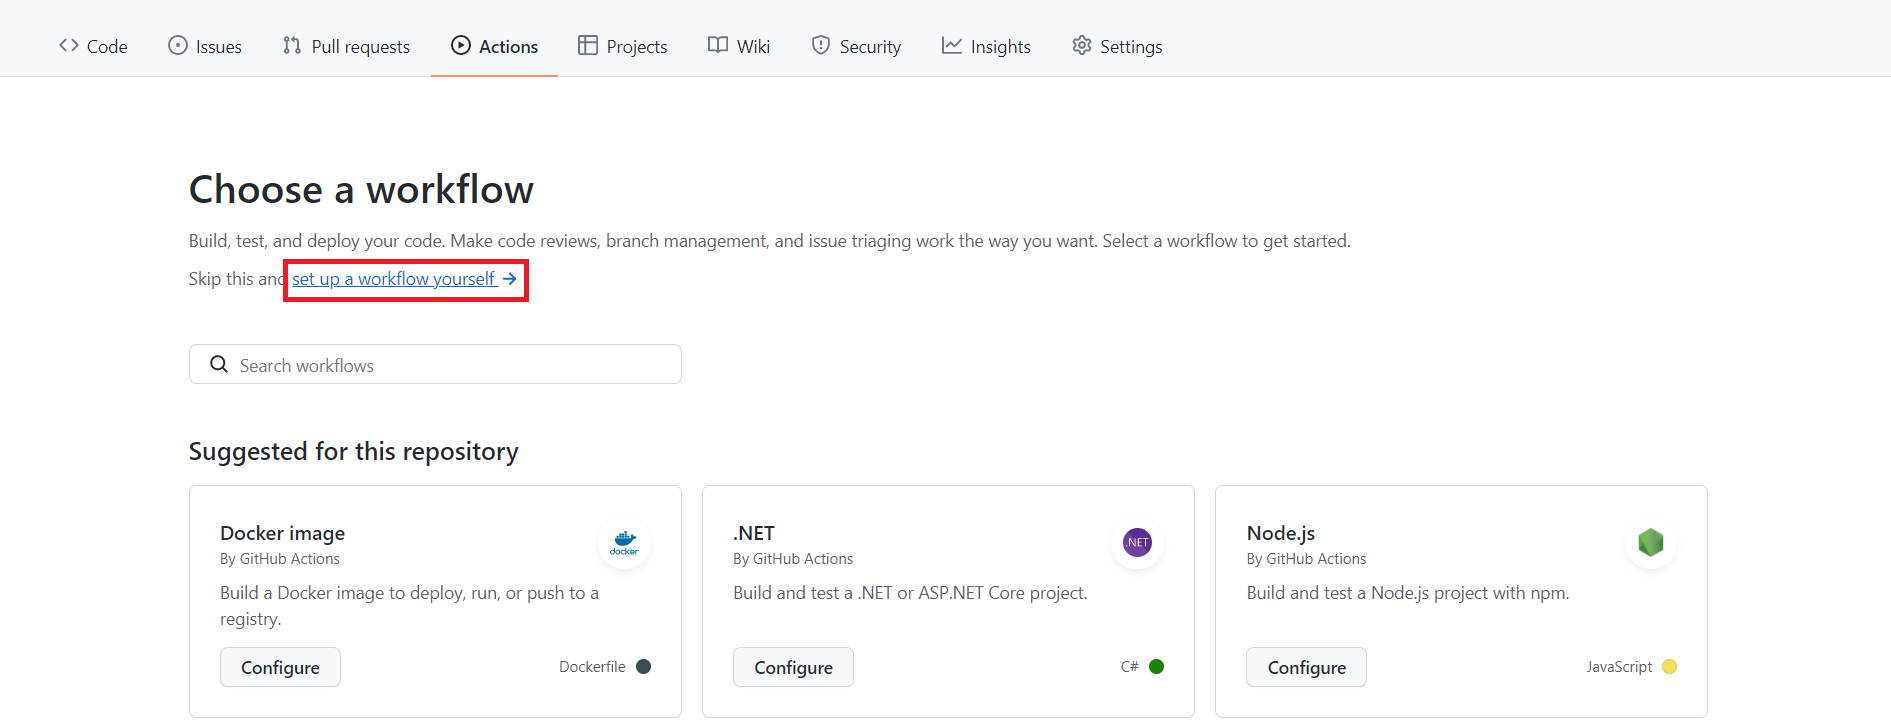
① Github의 Actions메뉴를 클릭해서 나오는 화면에서 New workflow버튼을 클릭합니다.

② workflow선택화면에서 set up a workflow yourself링크를 클릭합니다.
③ Aws S3연동의 파일명과 코드를 작성후에 Start commit버튼을 클릭해서 yml파일을 등록합니다.
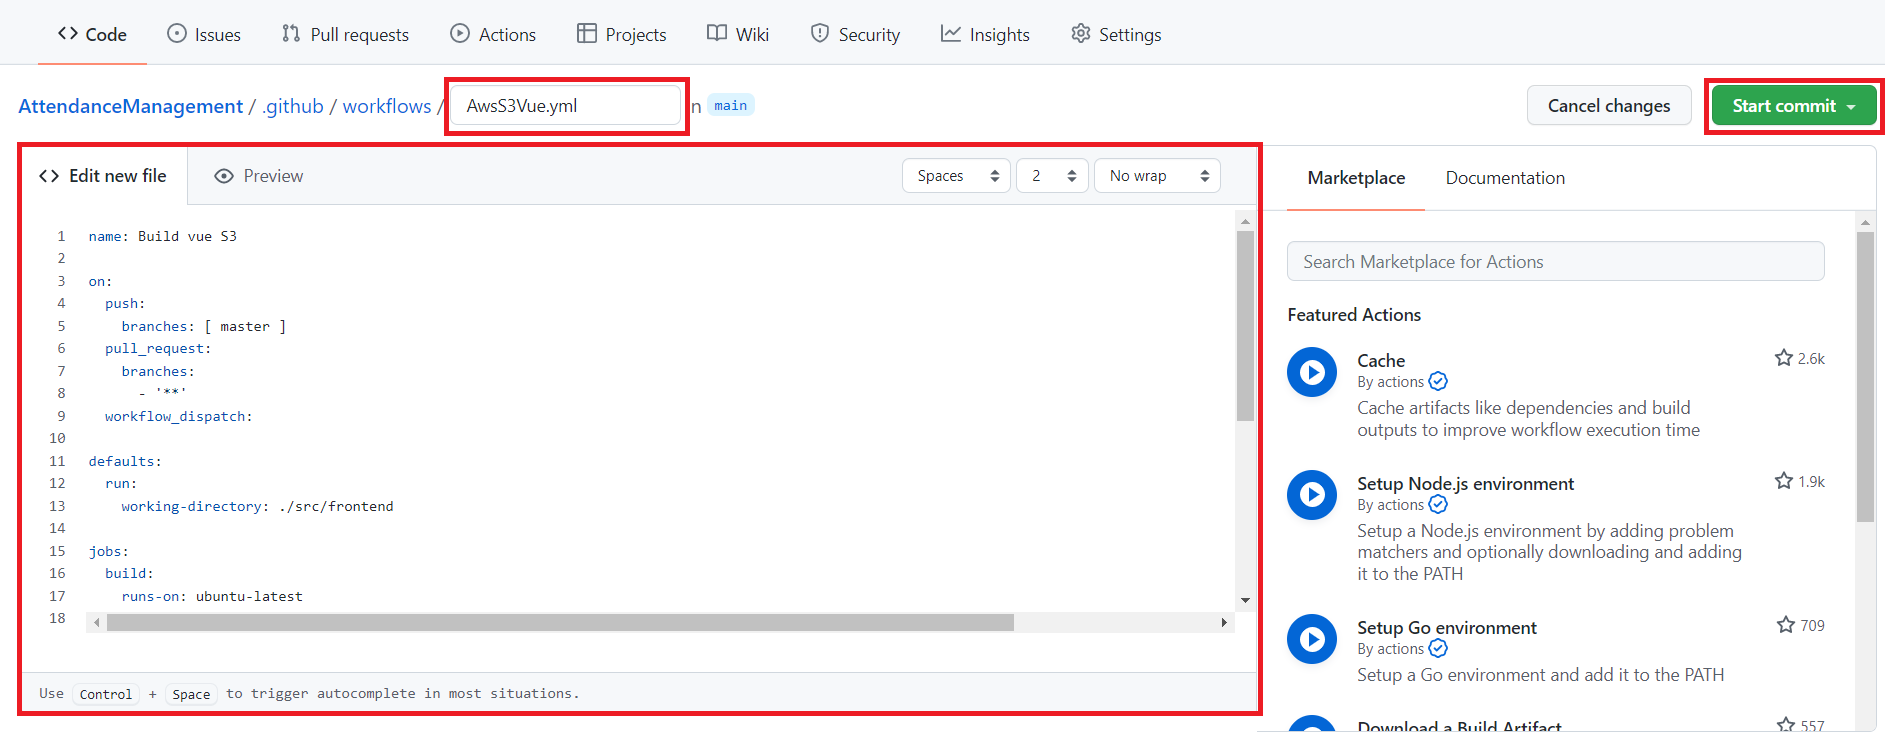

name: Build vue S3
on:
push:
branches: [ master ] #master브런치에 push가 이뤄질때 작동
pull_request:
branches:
- '**'
workflow_dispatch:
defaults:
run:
working-directory: ./ #작업 디렉토르 설정
jobs:
build:
runs-on: ubuntu-latest
steps:
- name: Checkout
uses: actions/checkout@master
- name: Install Dependencies # npm 설치
run: npm install
- name: Build # vue 프로젝트 빌드 파일 생성
run: npm run build
- name: Deploy # vue 프로젝트 빌드 파일을 Aws S3에 등록
env:
AWS_ACCESS_KEY_ID: ${{ secrets.등록한secrets Name }} # Github Actions에 등록한 secrets
AWS_SECRET_ACCESS_KEY: ${{ secrets.등록한secrets Name }} # Github Actions에 등록한 secrets
run: |
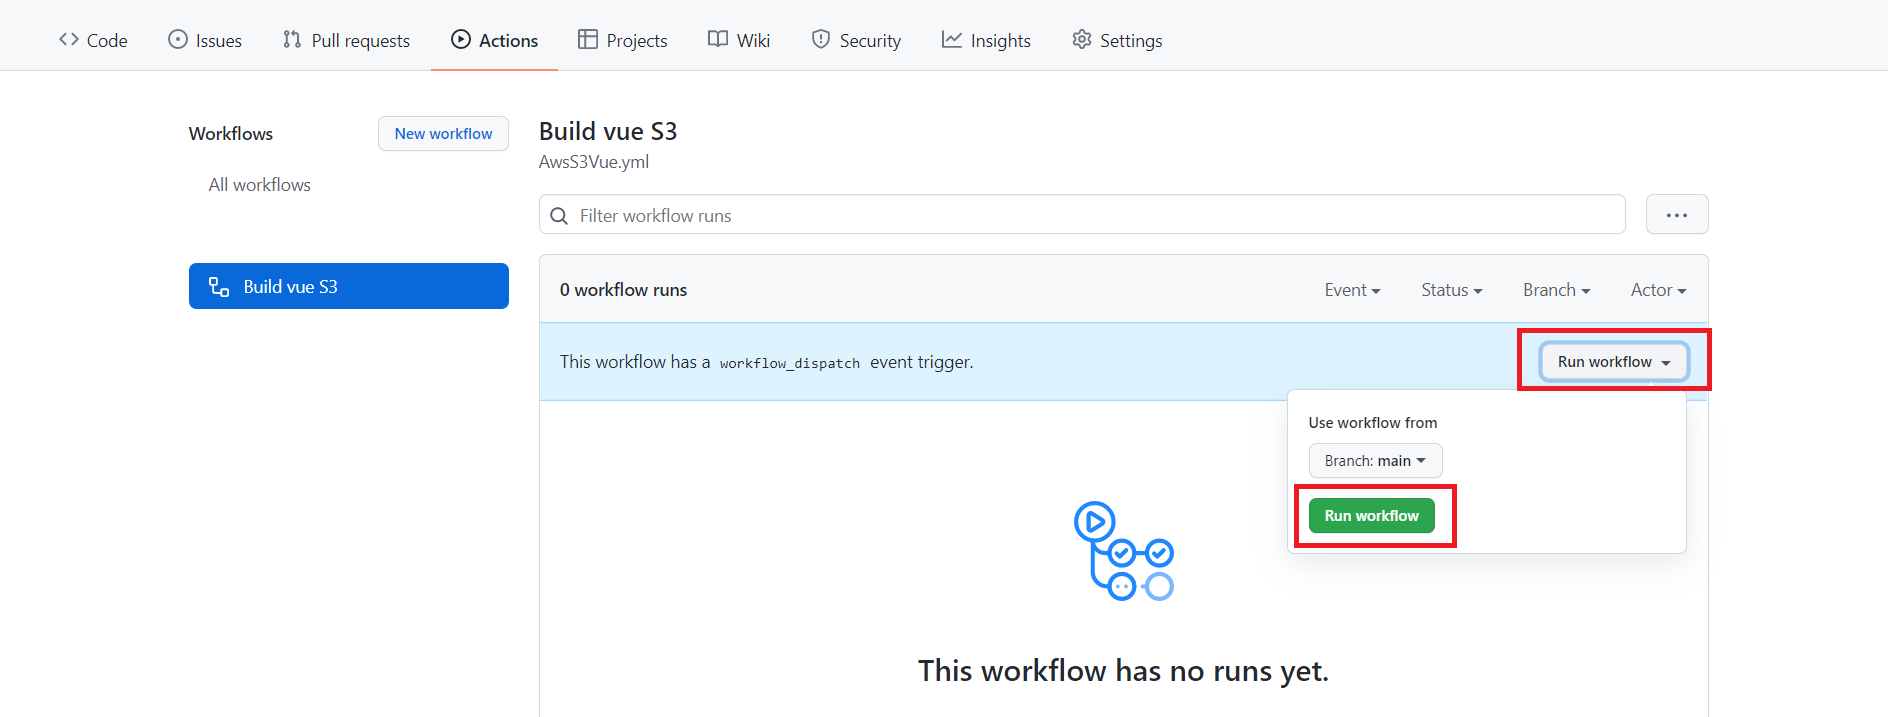
aws s3 cp --recursive --region AwsRegion(Aws등록리전) vue프로젝트빌드폴더 AwsS3ARN명④ Github Actions에 등록한 Workflows를 선택해서 Run workflow버튼을 클릭해서 등록한 yml파일을 실행합니다.

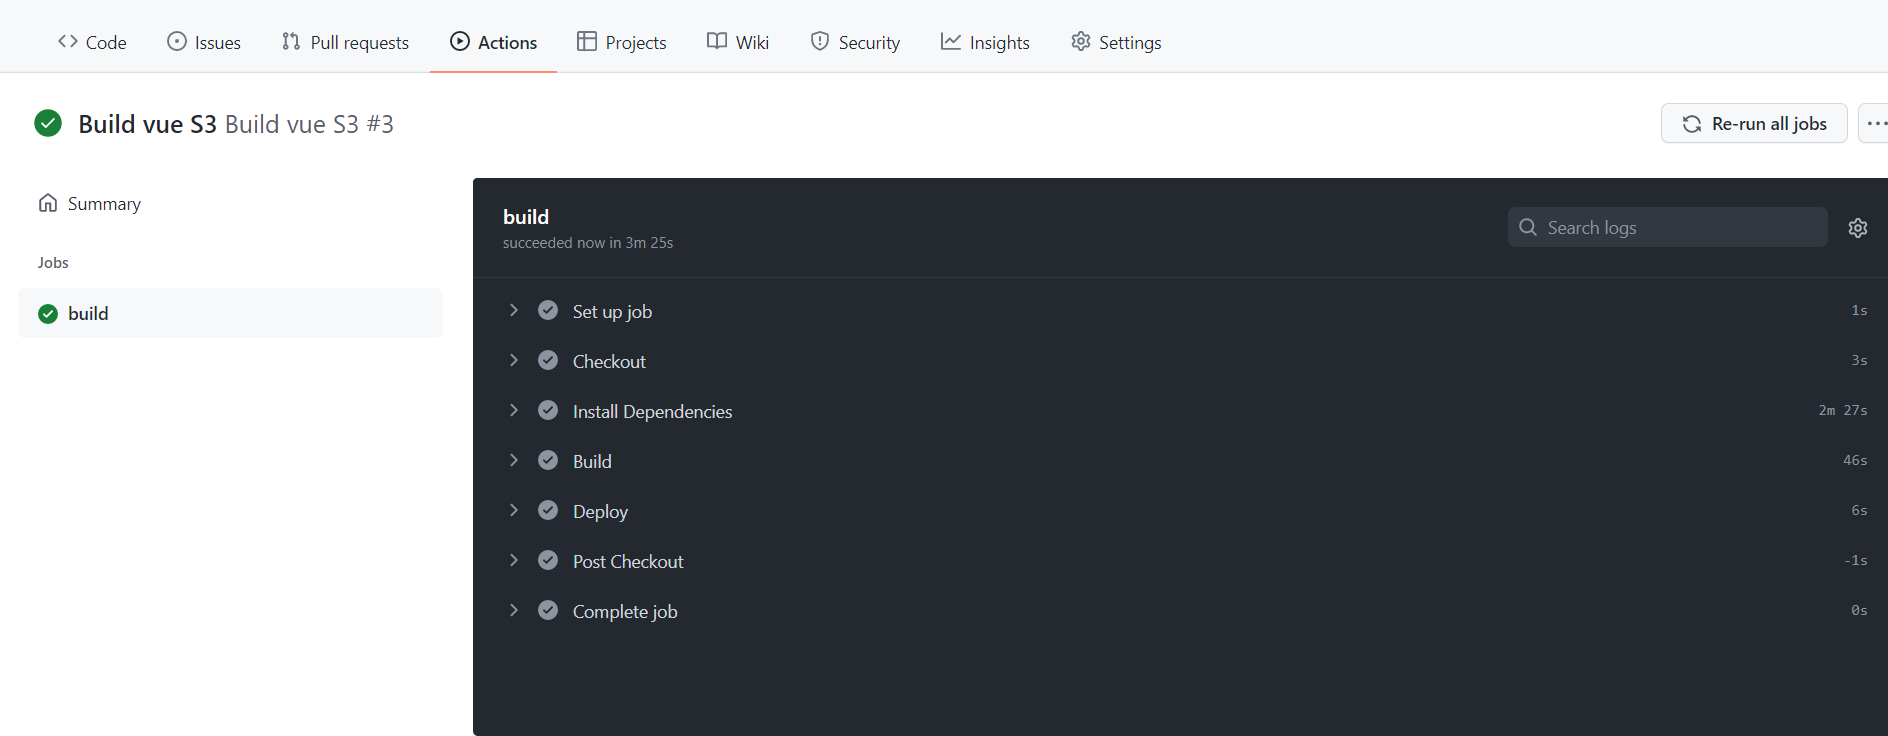
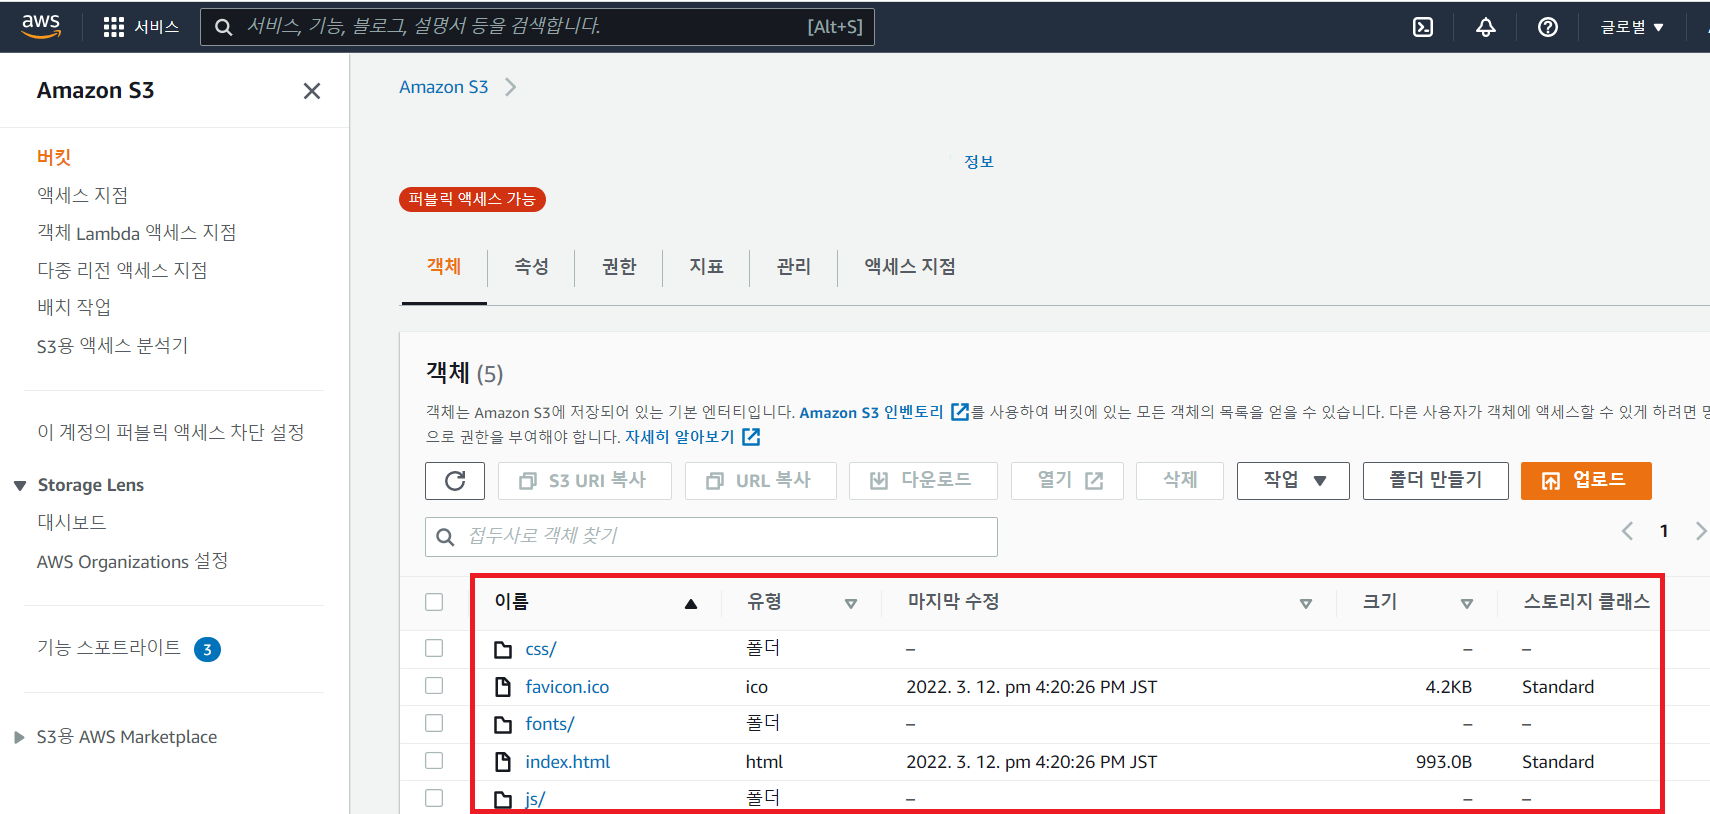
⑤ 등록한 Aws S3 객체를 확인해서 Github Actions에서 S3로 등록한 Vue 배포파일을 확인합니다.
반응형

댓글